
Create a customer-defined tool
Tools are created and edited from the Tools screen.
To create a new customer-defined tool:
-
In the Navigation pane, expand AI Agents, and then click Tools.
-
Click Add new tool.
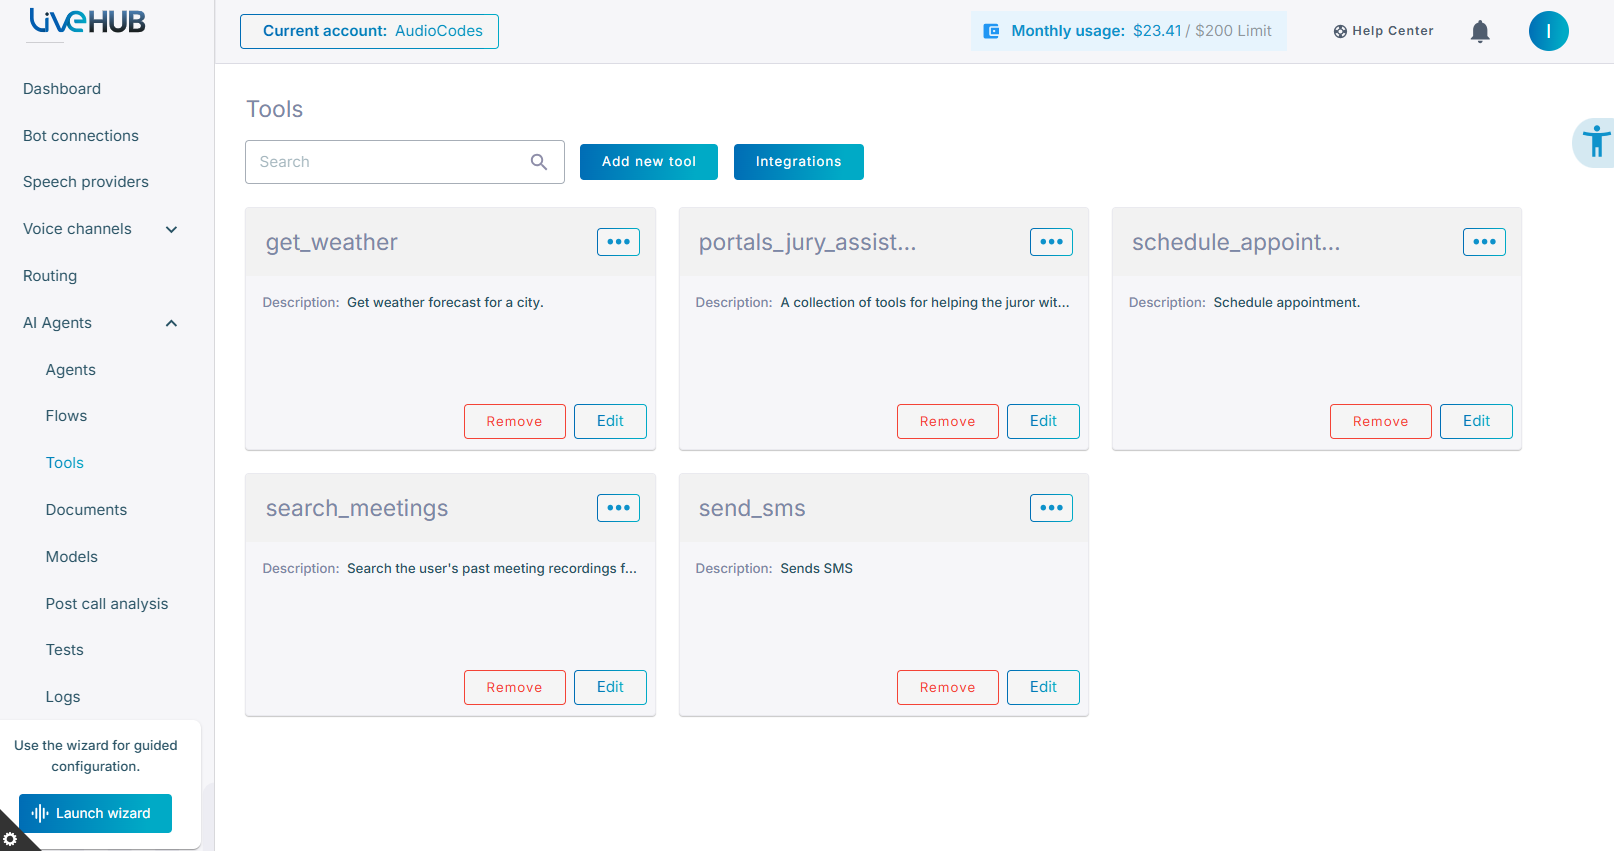
To create ready-made tools for a common provider in a few clicks, click Integrations instead — see Pre-built integrations.
The tool editor opens. Its settings are organized into the following tabs:
| Tab | Purpose |
|---|---|
| General | Tool name, type, endpoint and parameters. |
| Response | How the agent waits for and handles the tool's response. |
| Variables | Reusable named values referenced from the request. |
| Progress | Messages played to the caller while the tool runs. |
| Advanced | Advanced configuration parameters. |
When you finish configuring the tool, click Create (or Update when editing an existing tool).
You can validate the tool by clicking Test — see Testing a tool.
General tab
The General tab holds the tool's identity and its endpoint configuration. The fields shown depend on the selected Type.
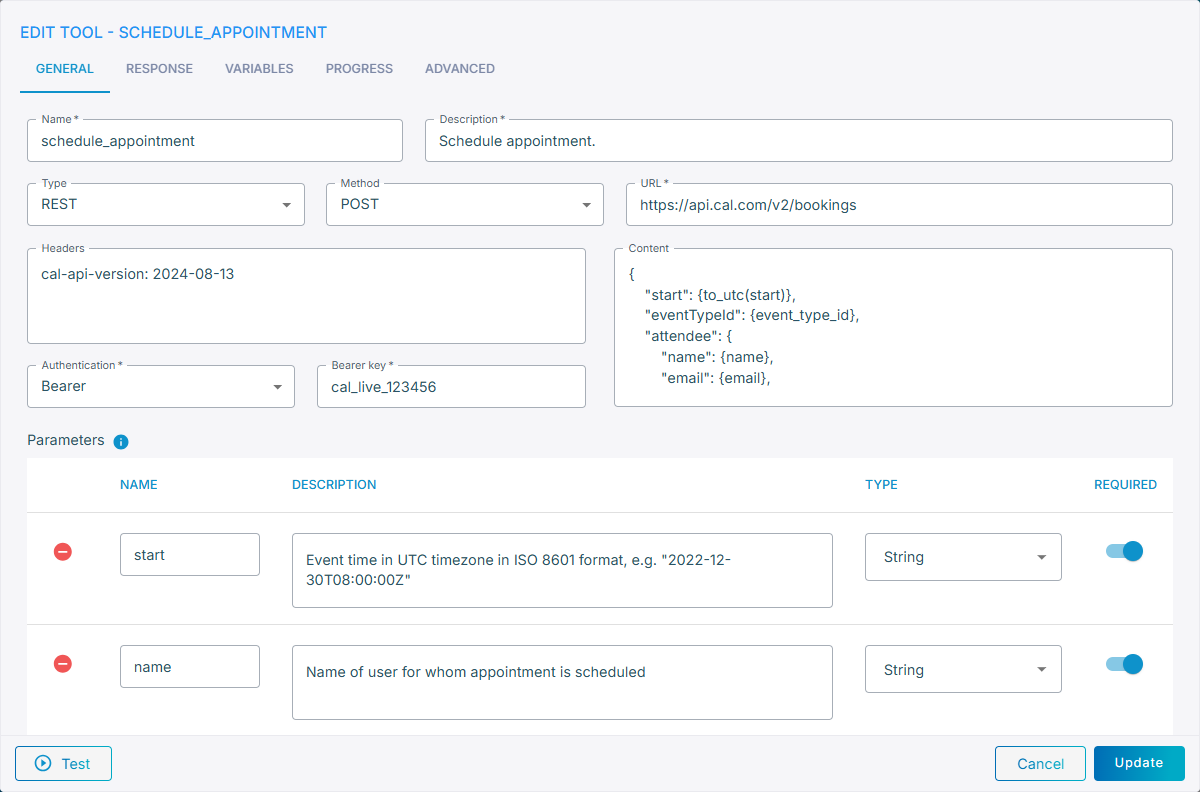
- Name – a short name for the tool, 3–32 characters long, using only letters, digits, underscores, hyphens or spaces.
- Description – the tool's purpose. Provide a clear, concise description to help the LLM decide when to call the tool. For MCP tools this field is less important, as the tool descriptions are provided by the MCP server.
- Type – the tool type:
REST– sends an HTTP/HTTPS request to an external API (the most common type).MCP– connects to a Model Context Protocol server. See MCP tools.Flow– runs a flow to completion, which is useful for complex, multi-step workflows. See Flow tools.
REST tools
For REST tools, configure the request:
- Method – the HTTP/HTTPS request method:
GET,POST,PUT,PATCHorDELETE.GETandDELETErequests have no body, so the Headers and Content fields are hidden for them. - URL – the URL where the request is sent. Must start with
http://orhttps://. For details, see Request structure. - Headers – the headers to include in the request.
- Content – the body of the request.
-
Authentication – the authentication method for the request:
Method Fields None– BasicUsername, Password BearerBearer key OAuth2Client ID, Client Secret, Token URL, Scope
In URL, Headers, Content and Authentication you can reference values by enclosing their name in curly brackets — {name}. You can reference the tool's parameters, the tool's own variables, and any of the dynamic variables available to the agent or flow — agent / flow variables and conversation data being the most prominent examples. For details, see Request structure.
Parameters
Under Parameters, define the values the LLM specifies each time it calls the tool. Click Add to add a parameter, then configure:
- Name – a short parameter name, 3–32 characters long, using only letters, digits or underscores.
- Description – the parameter's purpose. Provide a clear, concise description to help the LLM decide how to use the parameter.
- Type – the parameter type:
String,Integer,Float,Boolean,List of Strings,List of Integers,List of FloatsorList of Booleans. - Required – toggle on to make the parameter mandatory, off to make it optional.
The deprecated Header parameter type has been removed; use the Headers field instead.
MCP tools
For MCP (Model Context Protocol) tools, the agent discovers the tools provided by the MCP server at the beginning of the conversation and uses them during the conversation.
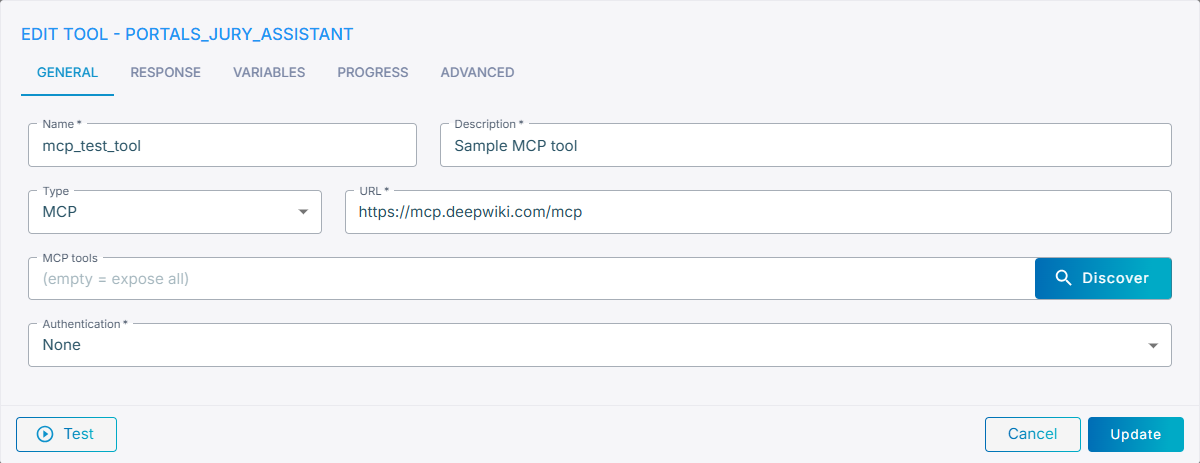
- URL – the URL of the MCP server. To connect to MCP servers that use the legacy SSE transport protocol, make sure the URL ends with
/sse. -
MCP tools – a comma-separated allow-list of MCP tool names to expose to the agent. Leave empty to expose all tools advertised by the server. Click Discover to connect to the server and pick the tools from a list:
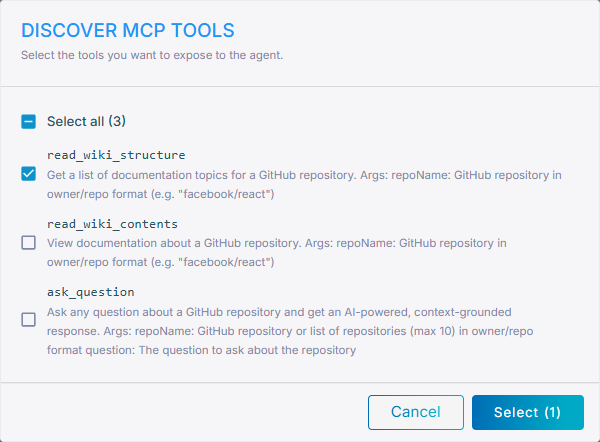
Select Select all or check individual tools, then click Select to write the chosen tool names back into the MCP tools field.
-
Authentication – same authentication methods as for REST tools.
For details, see MCP tools.
Response tab
The Response tab controls how the agent waits for and handles the tool's response.
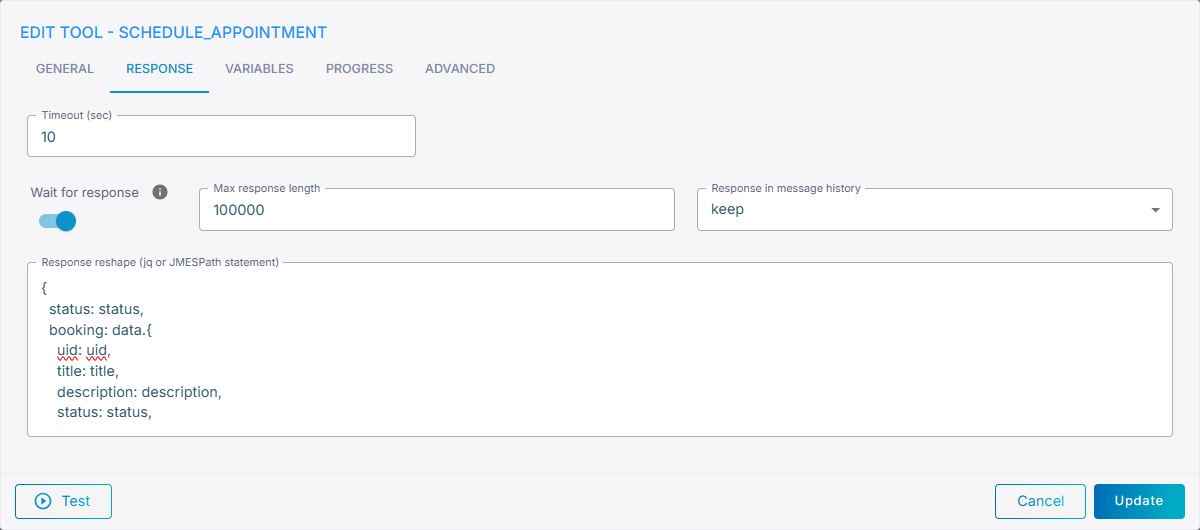
- Timeout (sec) – how long the agent waits for the tool's response. The conversation is paused while the tool runs.
- Wait for response – when on (default), the agent waits for the tool to finish before continuing. Turn it off to run the tool in the background (the agent does not wait for a result, and the remaining response fields are hidden).
- Max response length – the maximum length of the tool response, in characters (default
100000). - Response in message history – whether the tool response is kept in the conversation history (
keep, default) or removed from it (redact). - Response reshape (jq or JMESPath statement) – a jq or JMESPath statement applied to a successful response before it is passed to the LLM.
For details on these settings, see Customizing tool response.
Variables tab
The Variables tab defines reusable named values that are specific to this tool, referenced as {name} in the URL, Headers, Content and Authentication fields. Unlike parameters, variables are never exposed to the LLM.
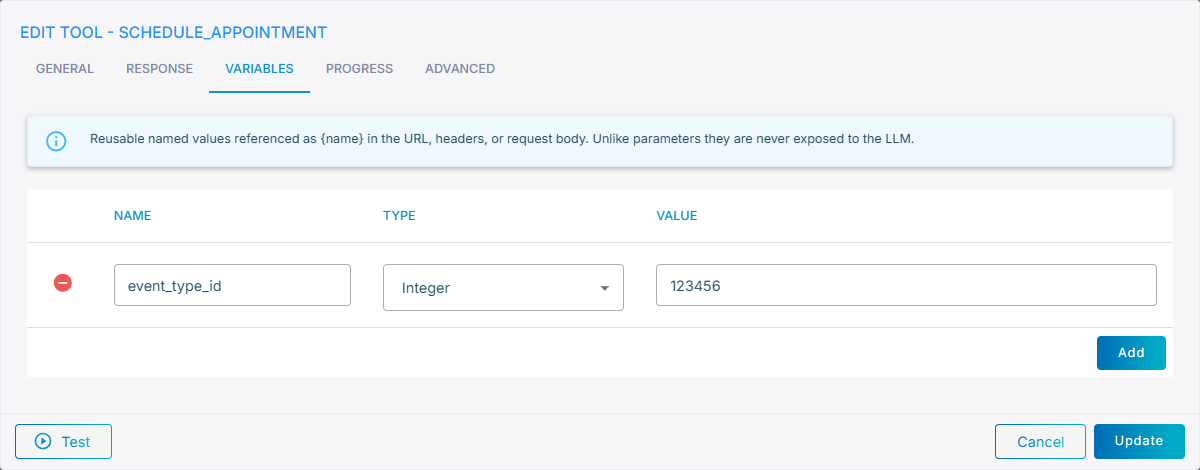
Click Add to add a variable, then configure its Name, Type (String, Integer, Float, Boolean or Secret) and Value.
These are tool-specific variables. All other variables available to the agent or flow — such as agent / flow variables and conversation data — can also be referenced as {name} in the same fields, so there is no need to redefine them here. A tool's variable takes precedence over the agent's or flow's variable of the same name.
For details, see Tool variables.
Progress tab
The Progress tab configures messages played to the caller while the tool runs, keeping the caller engaged during slow tool calls.
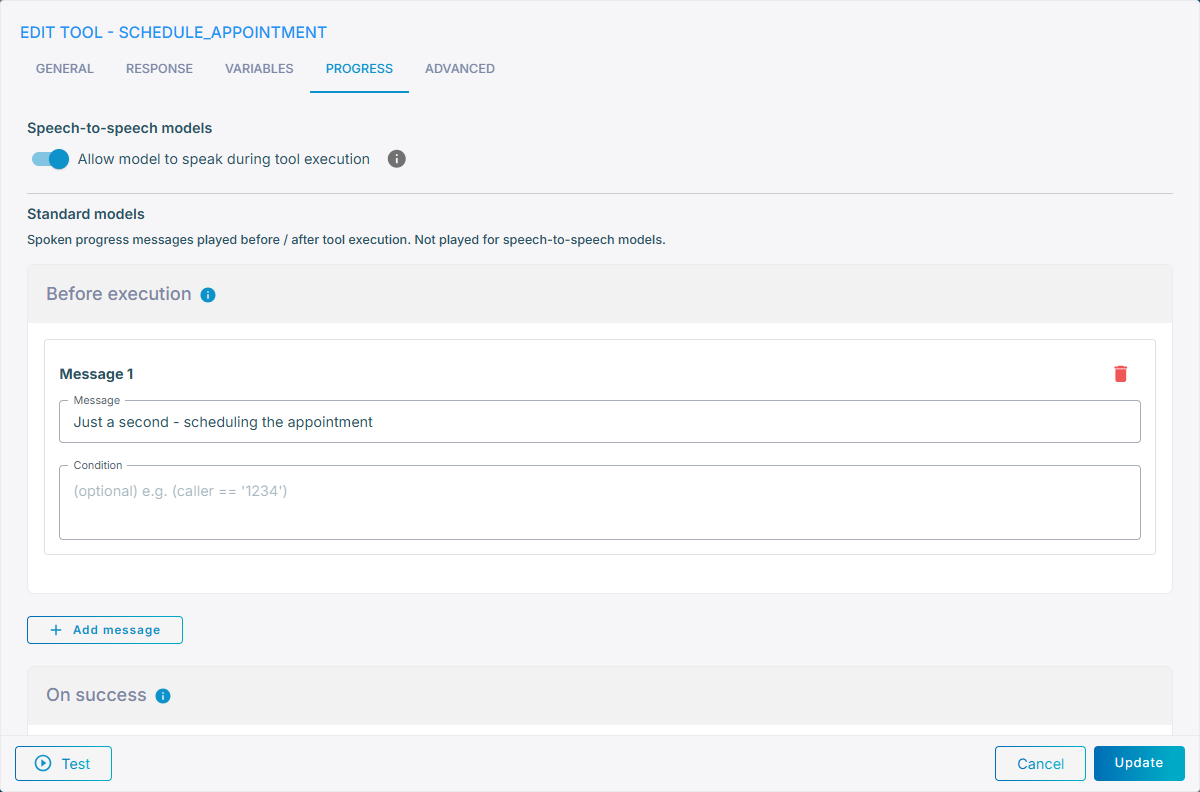
- Speech-to-speech models → Allow model to speak during tool execution – when on, the model keeps talking and can call other tools while this tool runs in the background; its result is folded into the conversation when ready. When off, the model waits for the tool to finish before responding.
- Standard models – spoken progress messages played at three stages of the tool call: During execution, On success and On failure. (These messages are not played for speech-to-speech models.) For each stage, click Add message and enter:
- Message – the text to speak. It may reference
{...}variables (for example,Checking order {order_id}…). - Condition – an optional condition, using the expression syntax, evaluated against the current agent / flow variables (for example,
(caller == "1234")). Among the messages whose condition is empty or evaluates to true, one is picked at random and spoken.
- Message – the text to speak. It may reference
- Sound during execution – hold music or typing played to the caller for as long as the tool runs, starting a couple of seconds in and stopping when the tool returns. Belongs to the During execution stage, alongside the message played there. Not played for speech-to-speech models or background tools.
For tools that run in the background (Wait for response off), only the During execution message is played, as there is no result to wait for.
For details, see Tool progress messages.
Advanced tab
The Advanced tab holds per-tool configuration as JSON. To view autocomplete options, press Ctrl + Space.
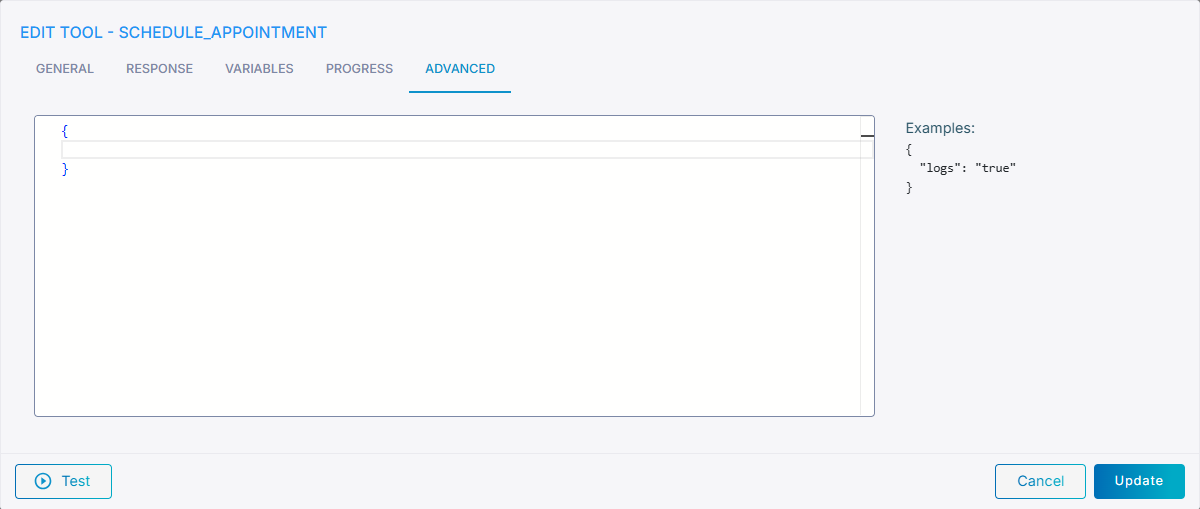
For example:
{"logs": true}– enable tool call logs (see Detailed tool call logs).{"send_metadata": true}– relay the tool's parameters and response to the platform after a successful call (see Relaying information to client application).{"allow_path_segments": true}– let a parameter or variable value add path segments to the request URL. A/in a substituted value is normally encoded as%2F, so the value fills exactly one segment and cannot change which resource the URL addresses. Enable this only when a parameter is meant to carry a multi-segment path, for example{"url": "https://api.example.com/files/{file_path}"}wherefile_pathisreports/2026/q1.pdf.
Testing a tool
Click Test at the bottom of the tool editor to run the tool against its configured endpoint without saving it.
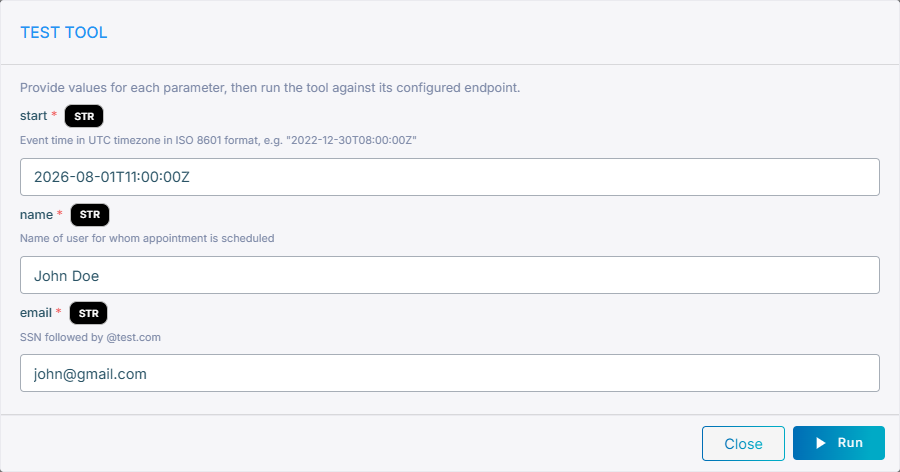
Provide a value for each parameter, then click Run. The result — status code and response body (including the reshaped response, if configured) — is shown below the parameters. For MCP tools, first pick the tool to test from the list, then provide its parameters.
Cloning a tool
To clone a tool:
-
On the tool's card, click the three dots (⋯) in the upper-right corner.
-
From the menu, select Clone. The duplicated card appears on your screen.